Protect Your ASP.NET Web API Using Azure ACS Service Identities
- Published on
- Reading time
- Authors
- Name
- Simon Waight
- Mastodon
- @simonwaight


Web 2.0 has lately been characterised by the increased proliferation of APIs available for consumption that create a "web of APIs" and open up the web for new businesses such as Stackla. In this post I am going to cover how you can utilise Windows Azure Access Control Services (ACS) as a Security Token Service (STS) to centralise and simplify authentication of external callers to your ASP.NET Web API using Simple Web Tokens.
A bit on Access Control Services (ACS) and Claims-based Authentication
Access Control Services has been one of the core Azure components for well over two years now and provides a simple (yet scalable and highly available) platform on which pretty much any application can rely for authentication (even if the application is not sitting on Azure!) ACS also provides you with an easy way to have a single integration point that provides logon support from Microsoft Accounts (formerly Live ID), Google, Yahoo!, Facebook, ADFS v2.0 and any endpoint supporting OpenID.
Understanding ACS requires some understanding of the main actors in a generic claims-based authentication system:
- Client Application: Any user or system that wishes to use the services of the Relying Party and must be authenticated in order to do so. In this post our Client will be a simple Windows console application.
- Relying Party (RP): As the name suggests it will rely on another actor in the claims process to authenticate its callers. Importantly the RP must have a trust relationship with the STS. For the purposes of this post the RP will be our Web API.
- Identity Provider (IdP): the ultimate source of the identity which will be used for authentication (and potentially authorisation). This may be a Microsoft Account or other third-party IdP such as Facebook. When using ACS you can also choose to use Service Identities where ACS is responsible for managing identities as well as issuing tokens - this will be what we are using for this post.
- Secure Token Service (STS): the coordinator that sits in the middle of everything and is responsible for issuing tokens on behalf of Identity Providers. These tokens are then passed to Relying Party applications. As previously noted, the STS must be trusted by any RP utilising its services as the RP has effectively delegated authentication.
Create a Web API Demo Application
... or bolt the necessary authentication code into your existing Web API.
The easiest way to wrap you head around the concepts in this post (and a good way to get the code necessary for your implementation) is to head over to the MSDN samples site and download the sample titled "MVC4 Web API With SWT Token Issued By Windows Azure Access Control Service (ACS)". This will provide you with a quick way to test out the key scenario described through the remainder of this post. You'll need to do the next section before you can run the code (it will compile OK but won't work as you're missing the authentication piece of the puzzle!)
Provision and Configure ACS
I'm assuming here that you already have an Azure subscription - if not you will need to go and sign up for one - you get a 90 day free trial (at time of post) and then after that you only pay for what you use.
Before you can use ACS you must set up a namespace that will be used as the unique identifier for your little piece of the ACS service.
- Log into the Azure portal and click the + NEW button in bottom left > App Services > Access Control > Quick Create.

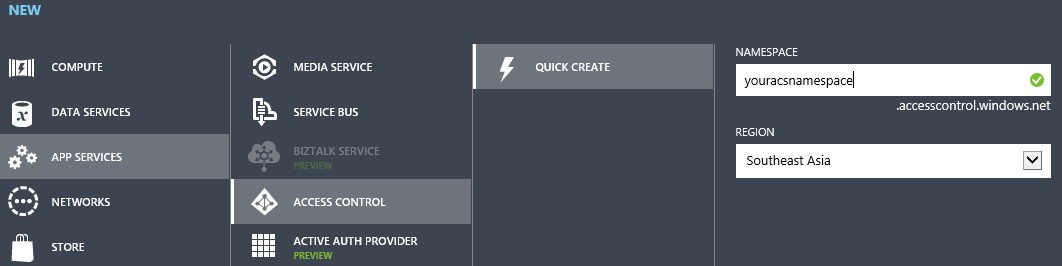
Enter a unique namespace for your ACS instance. The console will tell you if the namespace you've provided is unique and stop you from creating a duplicate.
After a short period of time the new ACS namespace will be provisioned and you can navigate to the management console for it by selecting the ACS namespace from the All Items view in the Azure portal and click "manage" at the bottom of the screen. This will open the ACS management screens which are based (at time of post) on the old Azure portal look and feel. Note the URL:
https://youraacsnamespace.accesscontrol.windows.net/v2/mgmt/web
- Add a new Relying Party Application and specify the following (if a field isn't mentioned leave as its default):
- A Name that describes your Web API and differentiates it from any others you may have (think also about dev / test / prod requiring their own RP definition).
- A Realm that will be used to scope the issued Token. Again, the Realm will most likely differ between environments, are case sensitive and are typically represented by a URL.
- Token format of SWT (Simple Web Token).
- Token lifetime. The default is 10 minutes. Think about how this value may affect your architecture - do you need to revalidate the token more or less often than this? Do you want to cache the token at your client application for a period to reduce chatter with ACS?
- Uncheck Windows Live ID for Identity Providers (this will cause ACS to use its own Service Identities).
- Under Rule Groups leave "Create new rule group" checked.
- Generate a new Token signing key (Note: this is important - this will be used in your Web API to validate the incoming Token).
- Click Save.
- Now we need to define the Rules for the Relying Party Application we just defined in step 4:
- Click on "Rule groups" on the left navigation and select the rule group you just created.
- Click on "Add" at the bottom of the screen.
- On the Add Claim Rule screen select "Access Control Service" for the Input Claims Issuer.
- Scroll down and click Save.
- Create a Service Identity for client applications (callers) to use when requesting a token from the STS:
- Click on "Service identities" on the left navigation.
- Click Add and then complete the form as follows:
- Name: this will be a unique identifier for the identity AND will be used for the username in making a request to ACS.
- Under Credential Settings select "Password" and then enter a strong password.
- Set the validity date range.
- Click Save.
At this point we're done with our ACS configuration. We can add / remove / invalidate Service Identities at any time which presents an easy way to control access to your API in a centralised place without needing to maintain a local access database. You could also modify the SWT to provide additional context (or claims) if you wished.
Tie It Together In the Demo
Load the demonstration you download previously into Visual Studio then make the following edits.
namespace TestClient
{
  class Program
  {
    // App Code Removed

    static string serviceNamespce = "youraacsnamespace";
    static string acsHostUrl = "accesscontrol.windows.net";
    static string realm = "http://yourrealm/";
    static string uid = "yourserviceidentity";
    static string pwd = "yoursupercomplexhardpassword";

    // App Code Removed
  }
}

namespace MVC4WebAPI.Services.ACS.SWT
{
  public class TokenValidationHandler : DelegationHandler
  {
    string serviceNamespace = "youracsnamespace";
    string acsHostName = "accesscontrol.windows.net";

    // comes from step 4 above
    trustedTokenPolicyKey = "**********************";
    trustedAudience = "http://yourrealm/";

    // App Code Removed
  }
}
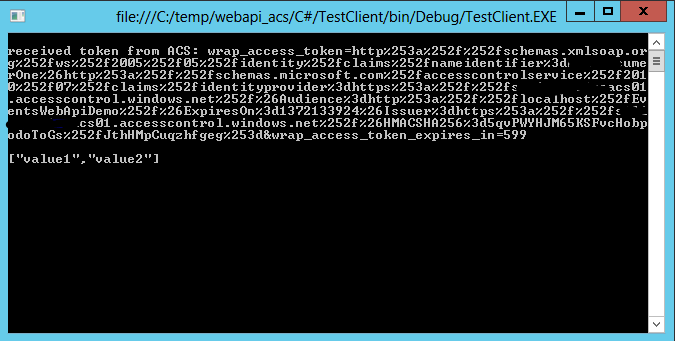
Now you can run the demo code and you should see a successful result returning a simple value array like the default Web API project does in ASP.NET.

Try changing one of the elements that you pass to the code and see what the result is - you should see that you receive a 401 Unauthorised. Note that in a production-ready system you'd not expose the reason for the failure as they do in the demonstration code but it's useful as a way to understand what code is being processed and is causing the authentication failure.
Hope you find this content useful - if you have any feedback, tips or other useful information please feel free to leave a reply below!