Continuous Deployment of Windows Services using VSTS
- Published on
- Reading time
- Authors
- Name
- Simon Waight
- Mastodon
- @simonwaight


I have to admit writing this post feels a bit "old skool". Prior to the last week I can't remember the last time I had to break out a Windows Service to solve anything. Regardless, for one cloud-based IaaS project I'm working on I needed a simple worker-type solution that was private and could post data to a private REST API hosted on the other end of an Azure VNet Peer.
While I could have solved this problem any number of ways I plumped for Windows Service primarily because it will be familiar to developers and administrators at the organisation I'm working with, but I figured if I'm going to have to deploy onto VMs I'm sure not deploying in an old-fashioned way! Luckily we're already running in Azure and hosting on VSTS so I have access to all the tools I need!
Getting Setup
The setup for this process is very similar to the standard "Deploy to Azure VM" scenario that is very well covered in the official documentation and which I added some context to in a blog post earlier in the year.
Once you have the basics in place (it only takes a matter of minutes to prepare each machine) you can head back here to cover off the changes you need to make.
Note: this process is going to assume you have a Windows Service Project in Visual Studio 2015 that is being built using VSTS's in-built build infrastructure. If you have other configurations you may need to take different steps to get this to work :)
Tweak build artefact output
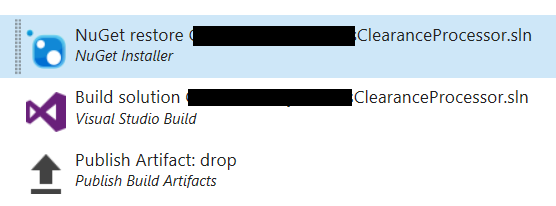
First we need to make sure that the outputs from our build are stored as artefacts in VSTS. I didn't use any form of installer packaging here so I needed to ensure my build outputs were all copied to the "drops" folder.
Here is my build definition which is pretty vanilla:

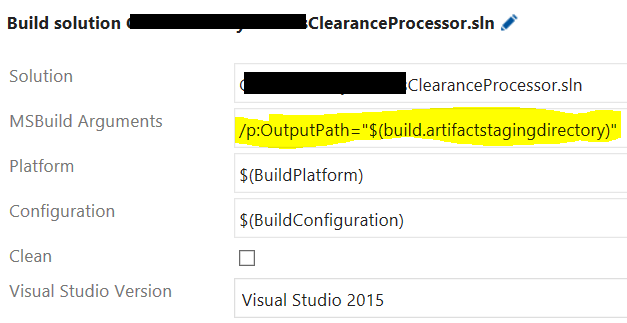
The tweak I made was on the Visual Studio build step (step 2) where I defined an additional MSBuild Argument that set the OutputPath to be the VSTS build agent's artifacts directory which will automatically be copied by the Publish Artifacts step:

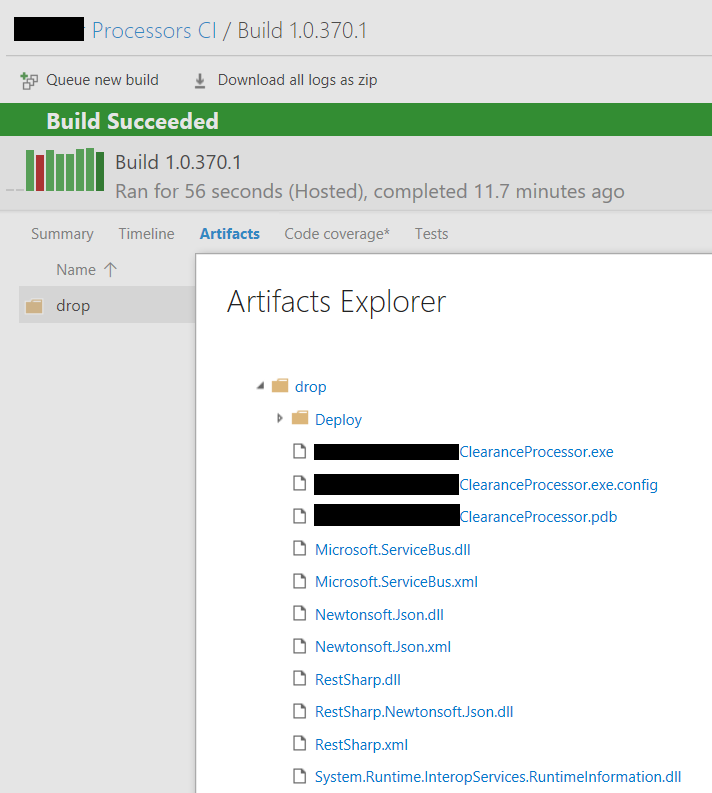
If I look at a history entry for my CI build and select Artifacts I can see that my Windows Service binary and all its associated assemblies, config files (and importantly Deployment Script) are stored with the build.

Now we have the build in the right configuration let's move on to the deployment.
Deploying a Service
This is actually easier than it used to be :). Many of us would remember the need to package the Windows Service into an MSI and then use InstallUtil.exe to do the install on deployment.
Fear not! You no longer need this approach for Windows Services!
PowerShell FTW!
Yes, that Swiss Army knife comes to the rescue again with the Get-Service, New-Service, Stop-Service and Start-Service Cmdlets.
We can combine these handy Cmdlets in our Deployment script to manage the installation of our Windows Service as shown below.
Configuration Main
 {
   Import-DscResource –ModuleName 'PSDesiredStateConfiguration'

   Node ('localhost')
   {
     Script DeployWindowsService
     {
       GetScript = {
         @{
           Result = ""
         }
       }

       TestScript = {
         $false
       }

       SetScript = {

            $serviceName = "ResponseProcessor"
            $displayName = "Simon Demonstration Response Processor"
            # location where our AzureVMs File Copy RM Task copies our build outputs
            $sourceLocation = "C:\temp\*"
            $destinationLocation = "C:\Program Files\Simon\PaymentProcessorService\"
            $binaryName = $destinationLocation + "Simon.Demo.ClearanceProcessor.exe"
            $serviceDef = Get-Service -Name $serviceName -ErrorAction SilentlyContinue

            If ($serviceDef -eq $null)
            {
                # first install - create directory
                New-Item $destinationLocation -ItemType directory
                Copy-Item $sourceLocation $destinationLocation -Force
                New-Service -Name $serviceName -StartupType Automatic -DisplayName $displayName -BinaryPathName $binaryName
            }
            else
            {
                # has already been installed
                if($serviceDef.Status -eq "Running")
                {
                    Stop-Service -Name $serviceName
                }
                Copy-Item $sourceLocation $destinationLocation -Force
            }

            Start-Service -Name $serviceName
       }
     }
   }
 }

 Main
The Release Management definition remains unchanged - all we had to do was ensure our build outputs were available to copy from the 'Drop' folder on the build and that they are copied to C:\temp\ on the target VM(s). Our Desployment Script takes care of the rest!
That's it! Next time your CI build passes your CD kicks in and your Windows Service will be updated on your target VMs!