Continuous Deployment for Docker with Azure DevOps and Azure Container Registry
- Published on
- Reading time
- Authors
- Name
- Simon Waight
- Mastodon
- @simonwaight


I've been watching with interest the growing maturity of Containers, and in particular their increasing penetration as a hosting and deployment artefact in Azure. While I've long believed them to be the next logical step for many developers, until recently they have had limited appeal to many every-day developers as the tooling hasn't been there, particularly in the Microsoft ecosystem.
Starting with Visual Studio 2015, and with the support of Docker for Windows I started to see this stack as viable for many.
In my current engagement we are starting on new features and decided that we'd look to ASP.Net Core 2.0 to deliver our REST services and host them in Docker containers running in Azure's Web App for Containers offering. We're heavy uses of Visual Studio Team Services and given Microsoft's focus on Docker we didn't see that there would be any blockers.
Our flow at high level is shown below.


- Developer with Visual Studio 2017 and Docker for Windows for local dev/test
- Checked into Azure DevOps and built using Azure Pipelines Build
- Container Image stored in Azure Container Registry (ACR)
- Continuously deployed to Web Apps for Containers.
We hit a few sharp edges along the way, so I thought I'd cover off how we worked around them.
Pre-requisites
There are a few things you need to have in place before you can start to use the process covered in this blog. Rather than reproduce them here in detail, go and have a read of the following items and come back when you're done.
- Setting up a Service Principal to allow your Azure DevOps environment to have access to your Azure Subscription(s), as documented by Donovan Brown.
- Create an Azure Container Registry (ACR), from the official Azure Documentation. Hint here: don't use the "Classic" option as it does not support Webhooks which are required for Continuous Deployment from ACR.
See you back here soon! 🙂
Setting up your Visual Studio project
Before I dive into this, one cool item to note, is that you can add Docker support to existing Visual Studio projects, so if you're interested in trying this out you can take a look at how you can add support to your current solution (note that it doesn't magically support all project types... so if you've got that cool XAML or WinForms project... you're out of luck for now).
Let's get started!
In Visual Studio do a File > New > Project. As mentioned above, we're building an ASP.Net Core REST API, so I went ahead and selected .Net Core and ASP.Net Core Web Application.

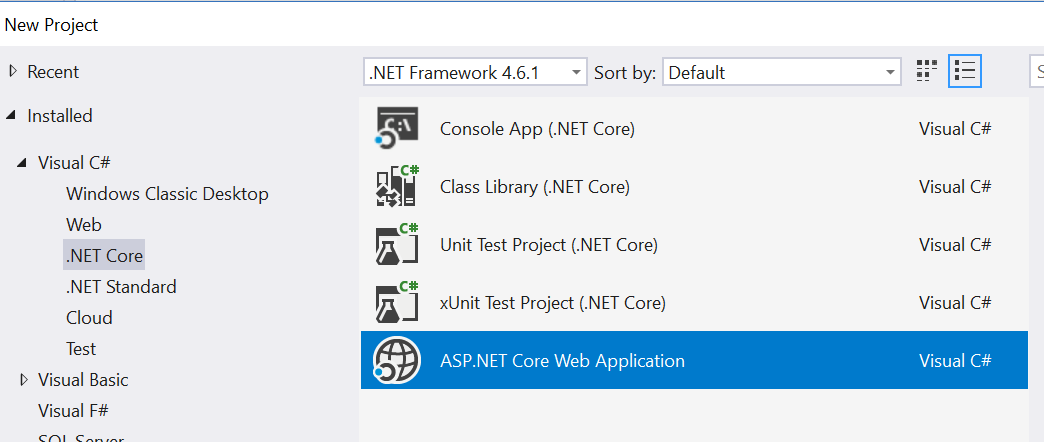
Once you've done this you get a selection of templates you can choose from - we selected Web API and ensured that we left Docker support on, and that it was on Linux (just saying that almost makes my head explode with how cool it is 😉 )


At this stage we now have baseline REST API with Docker support already available. You can run and debug locally via IIS Express or via Docker - give it a try 🙂.
If you've not used this template before you might notice that there is an additional project in the solution that contains a series of Docker-related YAML files - for our purposes we aren't going to touch these, but we do need to modify a couple of files included in our ASP.Net Core solution.
If we try to run a Docker build on Azure DevOps using the supplied Dockerfile it will fail with an error similar to:
COPY failed: stat /var/lib/docker/tmp/docker-builder613328056/obj/Docker/publish: no such file or directory
/usr/bin/docker failed with return code: 1
Let's fix this.
Add a new file to the project and name it "Dockerfile.CI" (or something similar) - it will appear as a sub-item of the existing Dockerfile. In this new file add the following, ensuring you update the ENTRYPOINT to point at your DLL.
FROM microsoft/aspnetcore-build:2.0 AS build-env
WORKDIR /app
# Copy csproj and restore as distinct layers
COPY *.csproj ./
RUN dotnet restore
# Copy everything else and build
COPY . ./
RUN dotnet publish -c Release -o out
# Build runtime image
FROM microsoft/aspnetcore:2.0
WORKDIR /app
COPY /app/out .
ENTRYPOINT ["dotnet", "SiliconValve.Vsts.DockerDemo.dll"]
This Dockerfile is based on a sample from Docker's official documentation and uses a Docker Container to run the build, before copying the results to the actual final Docker Image that contains your app code and the .Net Core runtime.
We have one more change to make. If we do just the above, the project will fail to build because the default dockerignore file is stopping the copying of pretty much all files to the Container we are using for build. Let's fix this one by updating the file to contain the following 🙂
bin/
obj/
!*.dll
!obj/Docker/publish/*
!obj/Docker/empty/
Now we have the necessary bits to get this up and running in Azure DevOps.
Azure Pipelines Build
This stage is pretty easy to get up and running now we have the updated files in our solution.
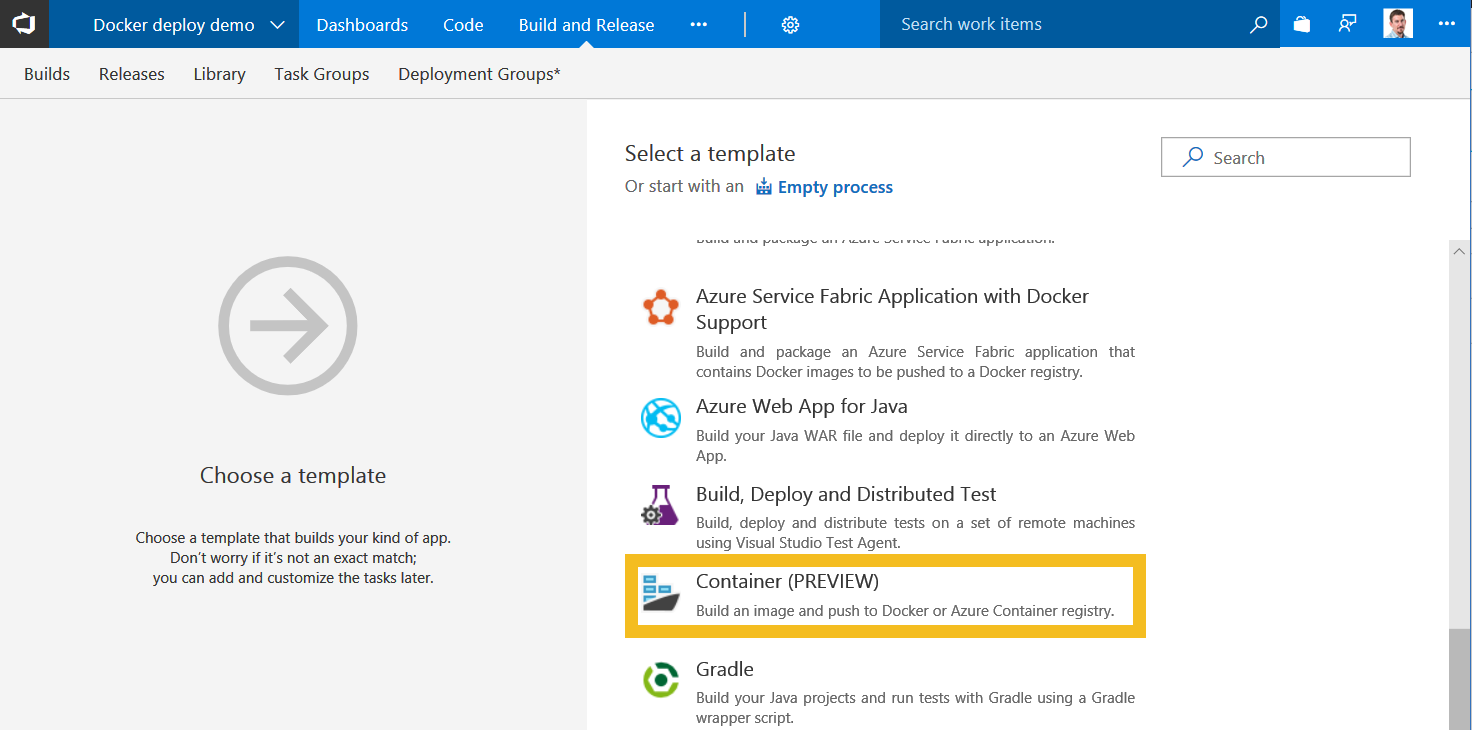
In Azure DevOps create a new Build and select the Container template (right now it's in preview, but works well).

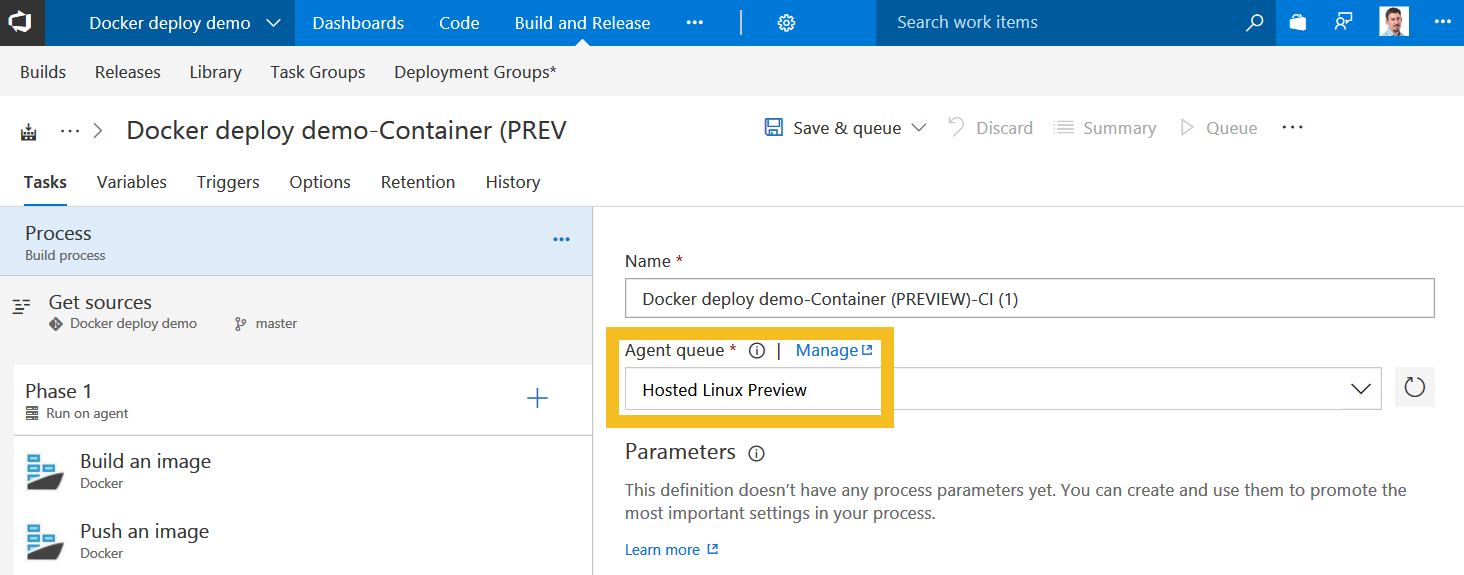
On the next screen, select the "Hosted Linux" build agent (also now in preview, but works a treat). You need to select this so that you build a Linux-based Image, otherwise you will get a Windows Container which may limit your deployment options.

We then need to update the Build Tasks to have the right details for the target ACR and to build the solution using the "Dockerfile.CI" file we created earlier, rather than the default Dockerfile. I also set a fixed name for the Image Name, primarily because the default selected by Azure DevOps typically tends to be invalid. You could also consider changing the tag from Build.BuildId to be Build.BuildNumber which is much easier to directly track in Azure DevOps.

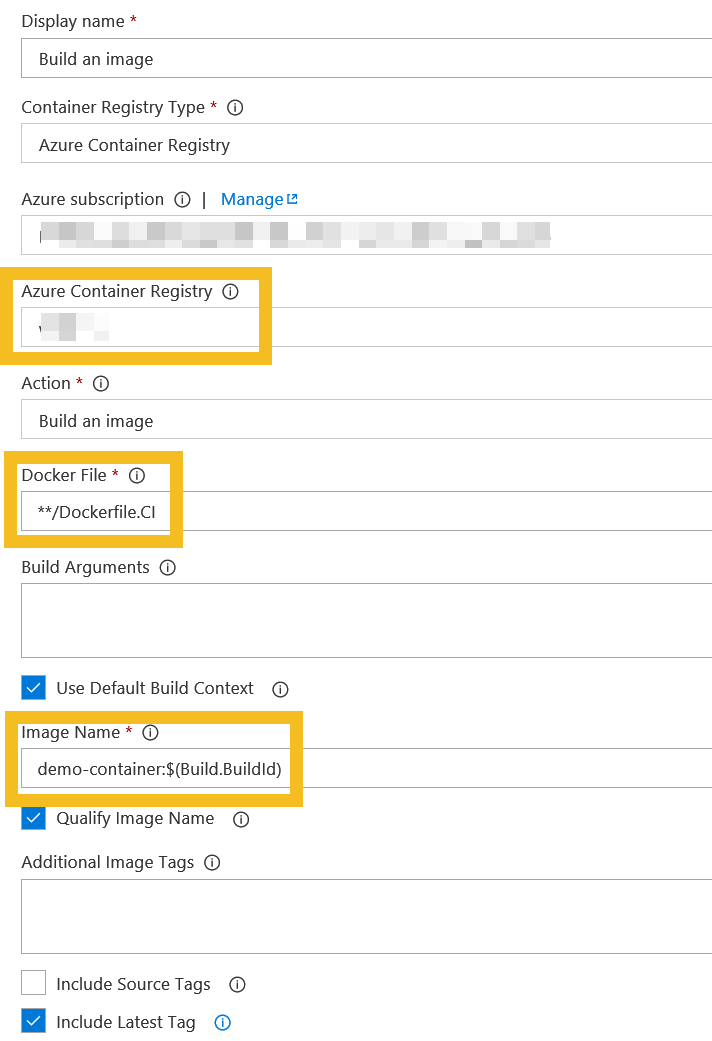
Finally, update the Publish Image Task with the same ACR and Image naming scheme.
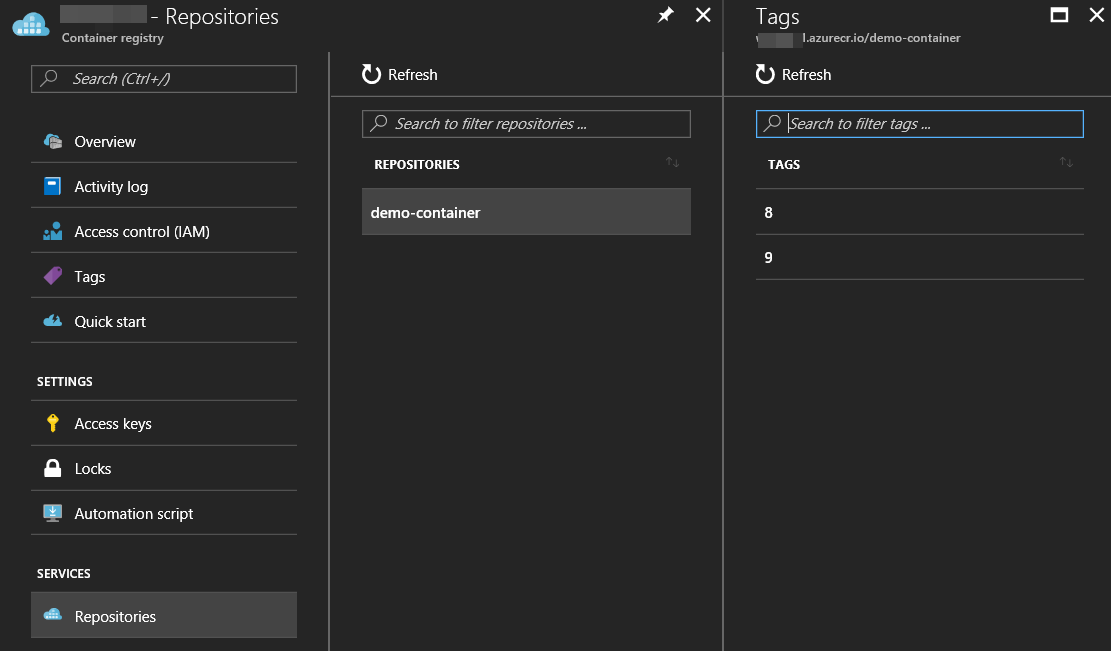
Running your build should generate an image that is registered in the target ACR as shown below.

Deploy to Web Apps for Containers
Once the Container Image is registered in ACR, you can theoretically deploy it to any container host (Azure Container Instances, Web Apps for Containers, Azure Container Services), but for this blog we'll look at Web Apps for Containers.
When you create your new Web App for Containers instance, ensure you select Azure Container Registry as the source and that you select the correct Repository. If you have added the 'latest' tag to your built Images you can select that at setup, and later enable Continuous Deployment.

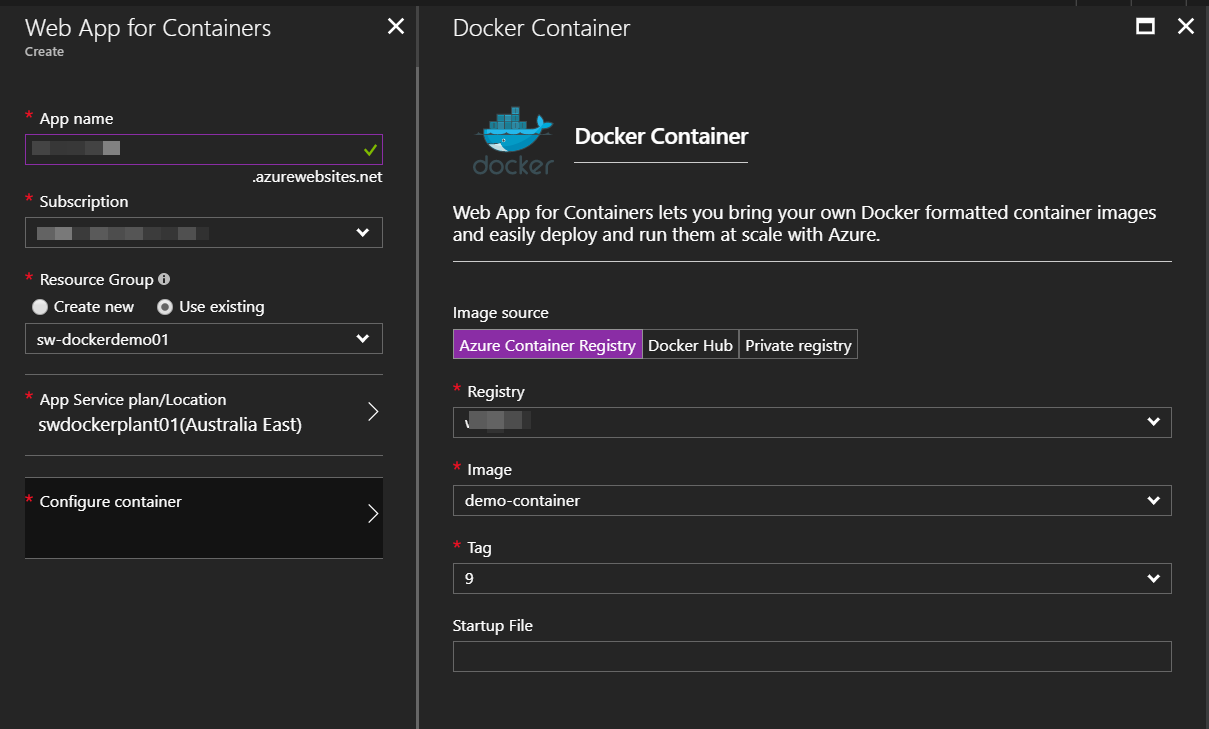
The result will be that your custom Image is deployed into your Web Apps for Containers instance and which will be available on ports 80 and 443 for the world to use.
Happy days!
I've uploaded the sample project I used for this blog to GitHub - you can find it at: https://github.com/sjwaight/docker-dotnetcore-vsts-demo
Also, please feel free to leave any comments you have, and I am certainly interested in other ways to achieve this outcome as we considered Docker Compose with the YAML files but ran into issues at build time.