Windows Containers and .NET Framework applications: Migration
- Published on
- Reading time
- Authors

- Name
- Simon Waight
- Mastodon
- @simonwaight
We previously looked at the basics of what is involved in bringing .NET Framework applications to Windows Containers. In this second post we are going to go a little deeper and look at migrating an application.
We already know that we have some discreet requirements around the types of applications that can be migrated, so for this post I am going to use one of the original ASP.NET MVC sample applications - MVC Music Store - the source code for which we can find on GitHub.
As previously discussed, anything earlier that .NET Framework 3.5 will require an upgrade to that release. Depending on the complexity of your solution this may or may not be a trivial task. If you've come here looking for a magic bullet for that... unfortunately I don't have one!
While MVC Music Store is a good sample application for this post, it's important to note that it is already running on .NET Framework 4.0 so there is not much work for us to do here, but I do want to bring it up to .NET Framework 4.7.2 - more on why later!
Your Toolkit
In order to have a go at this yourself you will need the following:
- A GitHub Account
- Hyper-V / virtualisation enabled in Windows 8 or 10 Pro
- Minimum of 10 GB free disk space for Windows Container / ASP.NET base images
- Docker Desktop for Windows
- Visual Studio - ideally 2017 (v15.7+) or 2019 (16.x). You can use the Community Edition if this is for non-commercial or open source contribution purposes. We want these versions as they include Docker tooling that we can use to build and debug the application
- .NET Framework 3.5.x or 4.x installed. Your target SDK must be installed to upgrade
- [Optional] Azure Subscription. For my purpose I will use Azure SQL Database as my database storage engine and in a later post I will use Azure Container Registry and Azure Kubernetes Service to host and run my containerised app.
Why not Visual Studio Code?
We are using the full Visual Studio application as opposed to Visual Studio Code because we are porting a .NET Framework application that likely relies on the Visual Studio Solution format. This format holds the metadata about how the multiple projects in the Solution relate to one another, along with build configurations. Visual Studio Code doesn't natively support Solution files, and while you can still work with the projects it would likely mean lots of lost time tying together the individual projects and building and releasing them.
Upgrade our application
Start by forking the MVC Music Store repository you can find on GitHub, followed by cloning it to a machine with your developer tools on. You can do this from the command line, or use the in-built Git support in Visual Studio.
Once cloned, open the solution in Visual Studio (for my purposes I'm using VS 2019 Community Edition). You will be prompted to migrate the project if you are using a newer release of Visual Studio than the solution was created with.
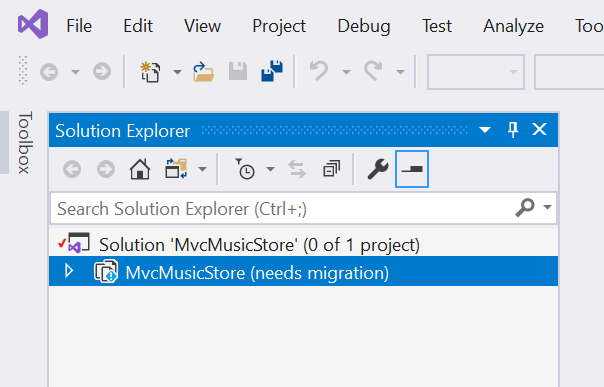
You can see the project isn't loaded at this point, so right-click on it and select 'Load Project' from the context menu. When you do this you will be presented with one or more dialogs that detail what changes are necessary to migrate the project to the version of Visual Studio you are running.
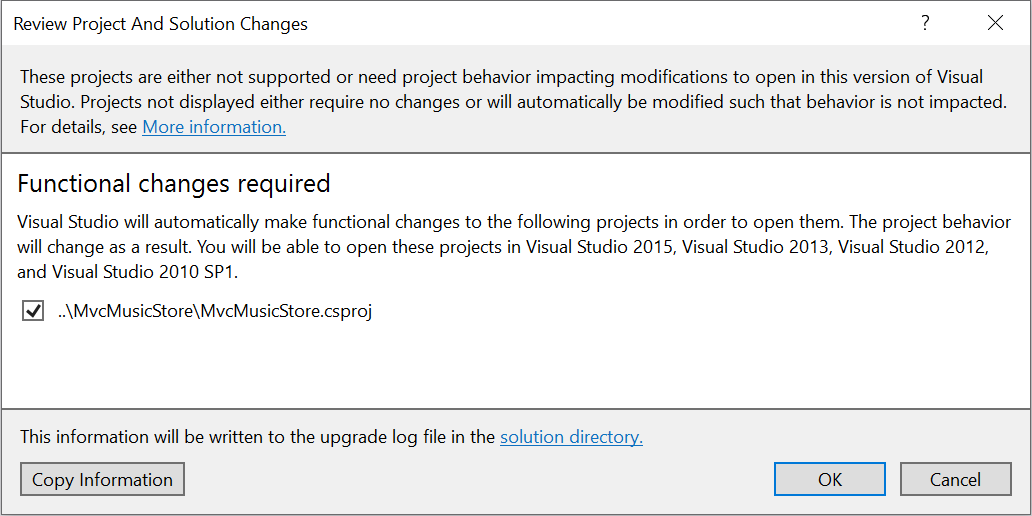
Interestingly, despite our migration we can still open this project all the way back to Visual Studio 2010!
Follow the prompts and migrate the projects using the in-built Visual Studio tooling. Depending on your solution this option may not be available. I realise the first sentence glosses over a lot of potential complexity, but in the case of our sample application, not much is required. It's likely with older or more complex solutions that this is where you will start your journey of upgrading / replacing components of your solution so it runs on a more modern release of the .NET Framework.
In the case of our sample MVC Music Store application the tooling advises that some features of ASP.NET MVC 3 may not work as expected in the IDE, and sure enough, if we open a Razor view we can see that there are lot of errors reported, though the solution builds and runs just fine.
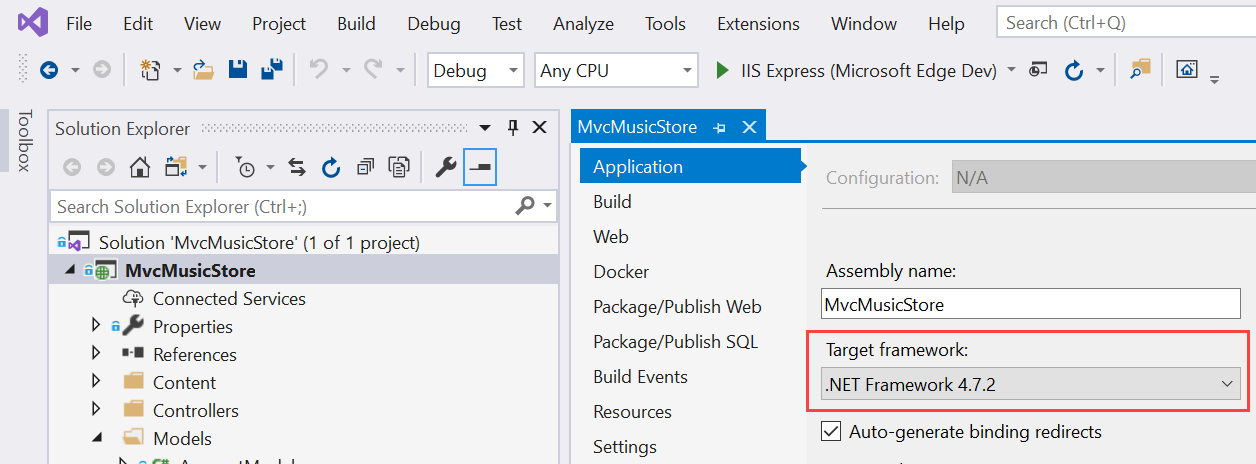
Now let's switch the .NET Framework version we're running on.
Right-click the project you want to change and choose Properties at the very bottom of the context menu. On the project properties Application tab, update the project to the .NET Framework version you want (note: you must have it installed in order to be able to select it). Once again, if you are making a big step up in Framework versions you may either receive lots of warnings or errors at this point, or you may be unable to change. If you have multiple projects you will need to bring them all up to the same level as well.
Once this update has been done (and you've fixed any issues arising) then let's restore the NuGet packages required to run the application. Open the Package Manager console by selecting the Tools menu > NuGet Package Manager > Package Manager Console and running the following three commands.
https://gist.github.com/sjwaight/f166f8c9d253c4501a4ed7ee4b328f20
At this point we should have a functional codebase that compiles and that can run. The final two pieces we need before we containerise the application are updating the app so it doesn't use SQL CE and so that session state is not "InProc".
As I mentioned earlier in the post, I have decided to use Azure SQL Database for my scenario, but you can use any SQL Server you like that doesn't get bundled with the app like SQL CE. The below script gives the Azure CLI commands you can use to create a new Serverless Azure SQL Database instance and obtain the connection string. Replace the placeholders with appropriate arguments.
https://gist.github.com/sjwaight/805ca7ea12837bd9b4993764bfc795b6
The MVC Music Store sample will automatically populate the database on first run, so we don't need to populate any data in the database, but we do need to modify the web.config file so that it points at the right Azure SQL Database for MusicStoreEntities connection string.
While you are editing the web.config, also find all instances of 'DefaultConnection' that were inserted when you installed the Microsoft.AspNet.Providers and set them to MusicStoreEntities so that all the providers use the same database. In a production environment we'd likely split all our provider datastores out from our application data, but for our sample application this will suffice.
For the session state we should have all the necessary bits present in the web.config after installing the Providers NuGet package. All you need to do to use SQL Server for session state is update the sessionState section of the web.config and point it at our SQL Database by using our Azure SQL DB connection string name for the DefaultSessionProvider.
https://gist.github.com/sjwaight/cd3de5ee0829e46f6b833cd2889aa707
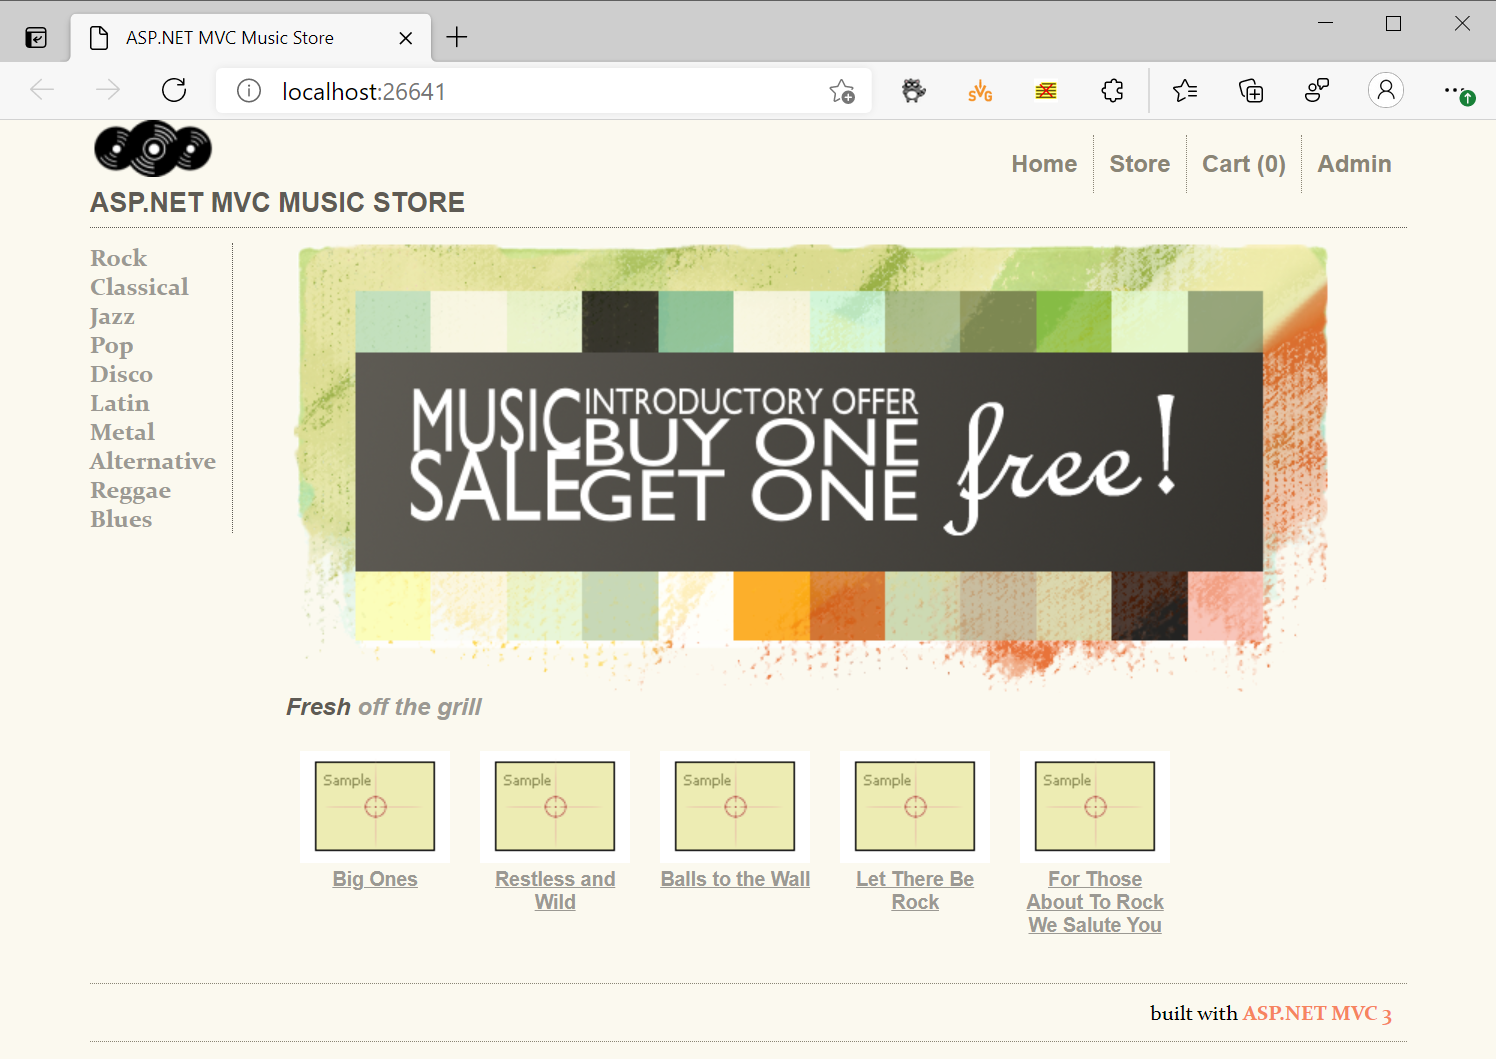
Now you should be able to run the application in Visual Studio and after a few moments the website will load and the database will be populated. Once you've had a click around you can stop debugging.
Note: if you want to use the 'Admin' section of the site you will need to manually create a new 'Administrator' role and then map it to a user you create via the website registration link. You can perform all these steps using the open source Azure Data Studio.
Containerising our application
Now the fun begins! 😁
In Visual Studio right-click on the project file and select Add > Docker Support...

After a few minutes processing you will find that a Dockerfile has been added to the project along with a .dockerignore file which controls what content is copied during a container build. You will also find that a new debug option appears in Visual Studio - you can debug with "Docker" which will build the application as a container image and deploy the image to Docker Desktop and then attach the debugger.
If you have been previously running Linux containers using Windows Subsystem for Linux (WSL) you will find when you first run your application in a container that the Visual Studio container tools will switch Docker to use Windows Containers instead.
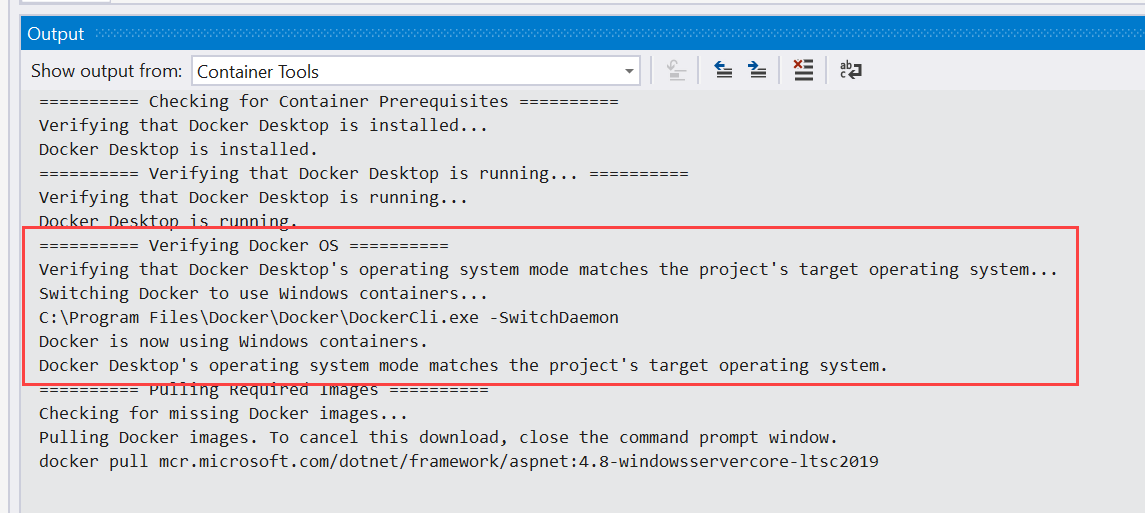
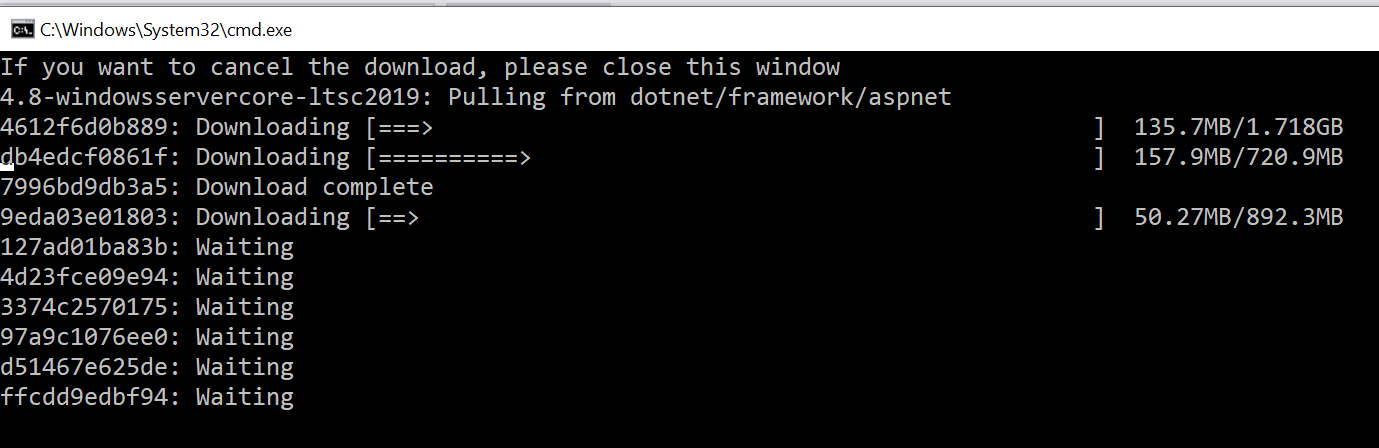
As you are also unlikely to have the base container image (the default currently for ASP.NET apps is '4.8-windowsservercore-ltsc2019) this image will also be downloaded and unpacked, which can take a while (and which is the reason you need free disk space!)
At this point, once the base image has downloaded everything should fire up just like it did previously. I think we can call that "step 1 complete" 😁.
Making an idempotent container image
Up until this point we've been focused on updating our application codebase to work with a more recent release of the .NET Framework, along with getting all the tooling and process in place so that inner loop development is rapid and not that different to a non-containerised app.
There is one item we still need to deal with though. This might be something you don't care about, but I suspect you will.
Here's how we currently manage how we connect to our database.
https://gist.github.com/sjwaight/0f967f35316d0f937974043d9f4078f0
In a traditional ASP.NET build and deployment environment we would likely use web.config transforms for each environment we want to deploy to and allow tooling like Web Deploy to manage this setting for us at deployment time. We could continue to use this approach, but it would mean a different container image per environment with the only difference being the configuration file. Not ideal with such large base image sizes and potentially a big overhead for large environments. This also isn't a common way of managing containers.
One reason you want to aim for .NET Framework 4.7.1+ is that Microsoft introduced some new capabilities in this release that provide a way for us to easily override certain web.config sections and use a more container-centric way of managing per-environment configuration. If you are unable to move up to this Framework release then you have some options. You could develop your own solution if you had enough applications warranting it, but I don't see why that yak shaving should be necessary.
For our scenario we are going to use environment variables to hold per-environment configuration and use the library Microsoft has provided. If this doesn't work for you, Microsoft PM, Anthony Chu has a good approach on his blog to solving this in other ways. If you are doing a lot of container or non-.NET development work then using environment variables for runtime configuration will be very familiar to you.
In order to support this capability in my MVC sample you need to install the NuGet package that contains the logic for this new configuration source.
Install-Package Microsoft.Configuration.ConfigurationBuilders.Environment -Version 2.0.0
You can read about the this and other configuration sources on the GitHub repository hosting the code.
Once installed you then need to do a few things on your development machine:
- Create an Windows environment variable called "MusicStoreEntities" (this matches the web.config key) and set its value to the connection string.
- Add an attribute to the connectionStrings section that sets it to be read from environment variables.
- Remove the connection string value from the config file so it just reads "ignored" (this avoids confusion later)
- Restart Visual Studio to force it to re-read environment variables.
The result is our configuration section looks like the below.
https://gist.github.com/sjwaight/cb673c354204ee9df644fdbd9546390a
At this stage we can run the application in Docker again and get....
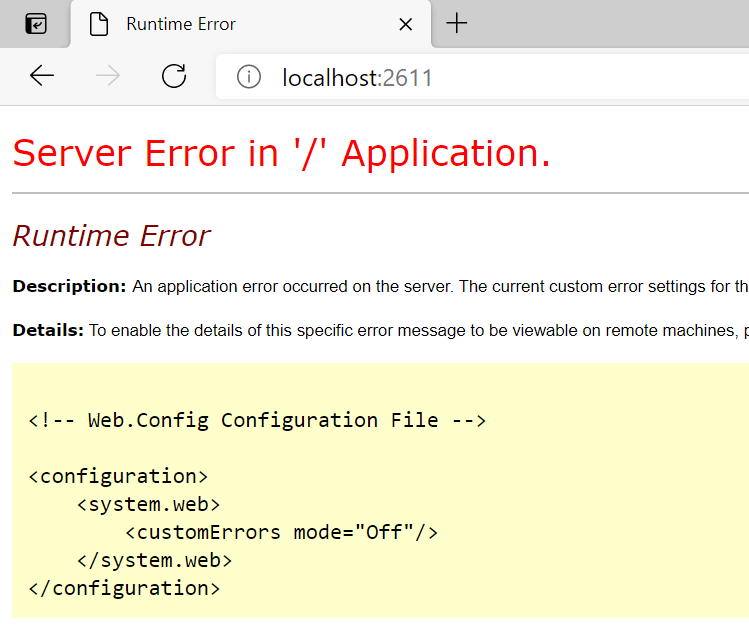
Oh.
Actually, we should expect this. We set the environment variable in Windows (the container host) but the value is not cascaded to the running container, so our running container has no idea how to connect to the database!
How to fix? The standard containerised app way is to pass the environment variable to the docker command when running the container, but this gets a tricky if we want to debug from within Visual Studio using the standard "hit F5" experience.
The solution we'll use comes from Stackoverflow and requires you to modify the csproj file manually and to add a pre-build event.
In the project file (after unloading it) find the Debug configuration (we don't want to use this for Release builds... we'll deal with those other ways) and add the following XML snippet.
<DockerfileRunEnvironmentFiles>debug_config.env</DockerfileRunEnvironmentFiles>
Once the XML snippet is added close the project file and reload the project and edit the pre-build event and populate the contents of this file by using the standard Windows echo command to write the environment variable to the file we referenced above (it's OK if the file doesn't exist - it will be created).
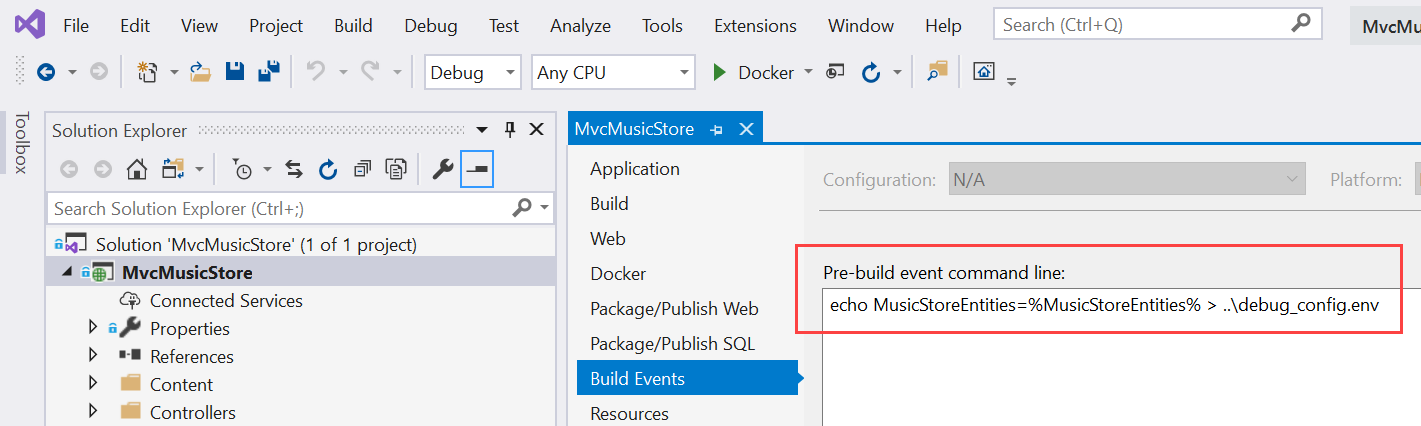
Now when you go to debug the solution the pre-build step will create the file that contains the environment variable which will be passed to the container at start and your database will now be accessible to the application that runs there.
Next steps
I could keep on going with this post, but I think this makes a logical place to pause.
For my next blog post on this topic I will cover how we can centralise our container image build and how we can define a deployment pipeline so the container image can be deployed to Azure Kubernetes Service (AKS).
In the meantime, if you'd like to see how the MVC Music Store solution is after the work we've done in this post, then you can check out that version of it on the 'post-containerisation' branch on GitHub.
Until next time! 😎
Featured image (on social posts) is from Jim Bahn on Flickr used under CC BY 2.0.